User:DrTapeworm/Pikmin 2 Re-Ducks: Difference between revisions
- Page tools
- What links here
- Related changes
- Printable version
- Permanent link
- Page information
- User tools
- User contributions
- Logs
- View user groups
DrTapeworm (talk | contribs) No edit summary |
m (Text replacement - "{{icon|Poison emitter|v=P2|y|n=Gas pipe}}" to "{{icon|Poison emitter|y|v=P2|n=Gas pipe}}") |
||
| (10 intermediate revisions by 2 users not shown) | |||
| Line 1: | Line 1: | ||
{{split|Split into cave articles named Ancient Gardens and Miracle X. Get [[User:DrTapeworm|DrTapeworm]]'s permission first.}} | |||
=Ancient Gardens= | |||
==Sublevel 1== | |||
*'''Theme''': Metal | *'''Theme''': Metal | ||
*'''Music''': ''Toybox 2'' | *'''Music''': ''Toybox 2'' | ||
*'''Enemies''': | *'''Enemies''': | ||
** | **{{icon|Breadbug|y|v=P2}} {{x|1}} | ||
** | **{{icon|Red Bulborb|y|v=P2}} {{x|6}} | ||
*'''Vegetation''': | |||
**None | |||
*'''Obstacles''': | *'''Obstacles''': | ||
**Fire geyser | **{{icon|Fire geyser|y}} {{x|9}} | ||
*'''Others''': | *'''Others''': | ||
**None | **None | ||
==Sublevel 2== | |||
*'''Theme''': Metal | *'''Theme''': Metal | ||
*'''Music''': ''Metal 3'' | *'''Music''': ''Metal 3'' | ||
*'''Enemies''': | *'''Enemies''': | ||
** | **{{icon|Armored Cannon Larva|y|v=P2|n=Armored Cannon Beetle Larva}} {{x|6}} | ||
** | **{{icon|Decorated Cannon Larva|y|v=P2|n=Decorated Cannon Beetle}} {{x|5}} | ||
*'''Vegetation''': | |||
**None | |||
*'''Obstacles''': | *'''Obstacles''': | ||
** | **{{icon|Boulder|y}} {{x|9}} | ||
** | **{{icon|Electrical wire|y}} {{x|9}} | ||
*'''Others''': | *'''Others''': | ||
**None | **None | ||
==Sublevel 3== | |||
*'''Theme''': Metal | *'''Theme''': Metal | ||
*'''Music''': ''Snow 1'' | *'''Music''': ''Snow 1'' | ||
*'''Enemies''': | *'''Enemies''': | ||
** | **{{icon|Dwarf Bulbear|y|v=P2}} {{x|51}} (18 fall from the sky) | ||
** | **{{icon|Spotty Bulbear|y|v=P2}} {{x|2}} | ||
** | **{{icon|Yellow Wollyhop|y|v=P2|n=Yellow Wollywog}} {{x|2}} | ||
*'''Vegetation''': | |||
**None | |||
*'''Obstacles''': | *'''Obstacles''': | ||
**{{icon|bramble gate|y|v=White|n=Bramble gate}} with 4,000 hit points {{x|1}} | |||
*'''Others''': | |||
**None | **None | ||
==Sublevel 4== | |||
*'''Theme''': Metal | *'''Theme''': Metal | ||
*'''Music''': ''None'' | *'''Music''': ''None'' | ||
*'''Enemies''': | *'''Enemies''': | ||
** | **{{icon|Burrowing Snagret|y|v=P2}} {{x|2}} | ||
** | **{{icon|Orange Bulborb|y|v=P2}} {{x|1}} | ||
** | **{{icon|Pileated Snagret|y|v=P2}} {{x|1}} | ||
*'''Vegetation''': | |||
**None | |||
*'''Obstacles''': | *'''Obstacles''': | ||
**Gas pipe | **{{icon|Poison emitter|y|v=P2|n=Gas pipe}} {{x|4}} | ||
*'''Others''': | *'''Others''': | ||
**Egg | **{{icon|Nectar egg|y|v=P2|n=Egg}} {{x|3}} | ||
==Sublevel 5== | |||
*'''Theme''': Metal | *'''Theme''': Metal | ||
*'''Music''': ''Rest'' | *'''Music''': ''Rest'' | ||
*'''Enemies''': | *'''Enemies''': | ||
**None | **None | ||
*'''Vegetation''': | |||
**{{icon|Queen Candypop Bud|y|v=P2}} {{x|2}} | |||
**{{icon|Violet Candypop Bud|y|v=P2}} {{x|1}} | |||
*'''Obstacles''': | *'''Obstacles''': | ||
**None | **None | ||
*'''Others''': | *'''Others''': | ||
** | **{{icon|Nectar egg|y|v=P2|n=Egg}} {{x|3}} (falls from the sky) | ||
==Sublevel 6== | |||
*'''Theme''': Concrete | *'''Theme''': Concrete | ||
*'''Music''': ''Snagret'' | *'''Music''': ''Snagret'' | ||
*'''Enemies''': | *'''Enemies''': | ||
** | **{{icon|Creeping Chrysanthemum|y|v=P2}} {{x|8}} | ||
** | **{{icon|Emperor Bulblax|y|v=P2}} {{x|1}} | ||
** | **{{icon|Gatling Groink|y|v=P2}} {{x|3}} | ||
*'''Vegetation''': | |||
**None | |||
*'''Obstacles''': | *'''Obstacles''': | ||
**None | **None | ||
| Line 79: | Line 84: | ||
**None | **None | ||
==Sublevel 7== | |||
*'''Theme''': Metal, yard | |||
*'''Theme''': | |||
*'''Music''': ''Electricity'' | *'''Music''': ''Electricity'' | ||
*'''Enemies''': | *'''Enemies''': | ||
** | **{{icon|Careening Dirigibug|y|v=P2}} {{x|2}} (falls from the sky) | ||
** | **{{icon|Dwarf Bulbear|y|v=P2}} {{x|6}} | ||
** | **{{icon|Dwarf Orange Bulborb|y|v=P2}} {{x|9}} | ||
** | **{{icon|Gatling Groink|y|v=P2}} {{x|2}} | ||
** | **{{icon|Hermit Crawmad|y|v=P2}} {{x|4}} | ||
*'''Vegetation''': | |||
**None | |||
*'''Obstacles''': | *'''Obstacles''': | ||
**Fire geyser | **{{icon|Fire geyser|y}} {{x|6}} | ||
**Gas pipe | **{{icon|Poison emitter|y|v=P2|n=Gas pipe}} {{x|5}} | ||
*'''Others''': | *'''Others''': | ||
** | **{{icon|bramble gate|y|v=White|n=Bramble gate}} with 4,000 hit points {{x|1}} | ||
==Sublevel 8== | |||
*'''Theme''': Metal, yard | |||
*'''Theme''': | |||
*'''Music''': ''Metal 2'' | *'''Music''': ''Metal 2'' | ||
*'''Enemies''': | *'''Enemies''': | ||
** | **{{icon|Fiery Blowhog|y|v=P2}} {{x|3}} | ||
** | **{{icon|Man-at-Legs|y|v=P2}} {{x|1}} | ||
** | **{{icon|Orange Bulborb|y|v=P2}} {{x|2}} | ||
** | **{{icon|Puffy Blowhog|y|v=P2}} {{x|2}} | ||
** | **{{icon|Toady Bloyster|y|v=P2}} {{x|1}} | ||
** | **{{icon|Water Dumple|y|v=P2}} {{x|4}} | ||
*'''Vegetation''': | |||
**None | |||
*'''Obstacles''': | *'''Obstacles''': | ||
**Fire geyser | **{{icon|Fire geyser|y}} {{x|8}} | ||
*'''Others''': | *'''Others''': | ||
**Egg | **{{icon|Nectar egg|y|v=P2|n=Egg}} {{x|4}} | ||
==Sublevel 9== | |||
*'''Theme''': Metal | *'''Theme''': Metal | ||
*'''Music''': ''Soil 2'' | *'''Music''': ''Soil 2'' | ||
*'''Enemies''': | *'''Enemies''': | ||
** | **{{icon|Burrowing Snagret|y|v=P2}} {{x|4}} | ||
**{{icon|Careening Dirigibug|y|v=P2}} {{x|17}} (11 fall from the sky) | |||
**{{icon|Dwarf Bulbear|y|v=P2}} {{x|9}} | |||
** | **{{icon|Spotty Bulbear|y|v=P2}} {{x|2}} | ||
*'''Vegetation''': | |||
**None | |||
*'''Obstacles''': | *'''Obstacles''': | ||
**Electrical wire | **{{icon|Electrical wire|y}} {{x|4}} | ||
**Bomb | **{{icon|Bomb rock|y}} {{x|9}} | ||
*'''Others''': | *'''Others''': | ||
**None | **None | ||
==Sublevel 10== | |||
*'''Theme''': Toybox | *'''Theme''': Toybox | ||
*'''Music''': ''None'' | *'''Music''': ''None'' | ||
*'''Enemies''': | *'''Enemies''': | ||
** | **{{icon|Segmented Crawbster|y|v=P2}} {{x|1}} | ||
*'''Vegetation''': | |||
**None | |||
*'''Obstacles''': | *'''Obstacles''': | ||
**None | **None | ||
| Line 137: | Line 146: | ||
**None | **None | ||
=Miracle X= | |||
{{clean|Add the remaining icons, and clean all sections beyond that of sublevel 1.}} | |||
[[File: | ==Sublevel 1== | ||
[[File:P2R Miracle X s1.png|thumb|200px|Sublevel 1.]] | |||
*'''Theme''': Metal | *'''Theme''': Metal | ||
*'''Music''': ''Metal 2'' | *'''Music''': ''Metal 2'' | ||
*'''Treasures''': | *'''Treasures''': | ||
**Disguised Delicacy | **{{icon|Disguised Delicacy|y|v=P2}} | ||
*'''Enemies''': | *'''Enemies''': | ||
** | **{{icon|Hairy Bulborb|y|v=P2}} {{x|3}} | ||
** | **{{icon|Volatile Dweevil|y|v=P2}} {{x|9}} (falls from the sky) | ||
*'''Obstacles''': | *'''Obstacles''': | ||
**Fire geyser | **{{icon|Bomb rock|y}} {{x|9}} | ||
**{{icon|Fire geyser|y}} {{x|5}} | |||
*'''Others''': | *'''Others''': | ||
**None | **None | ||
The first sublevel of Miracle X is simple but also one of the more dangerous ones, as the majority of enemies are Volatile Dweevils that ambush [[leader]]s and [[Pikmin family|Pikmin]] from above. Scouting out the area with a captain is highly recommended. | |||
[[File: | |||
==Sublevel 2== | |||
[[File:P2R Miracle X s2.png|thumb|200px|Sublevel 2.]] | |||
*'''Theme''': Metal | *'''Theme''': Metal | ||
*'''Music''': ''Metal 3'' | *'''Music''': ''Metal 3'' | ||
| Line 161: | Line 172: | ||
**Implement of Toil | **Implement of Toil | ||
*'''Enemies''': | *'''Enemies''': | ||
**[[Yellow Wollywog]] | **[[Yellow Wollywog]] {{x|3}} | ||
**[[Armored Cannon Beetle Larva]] | **[[Armored Cannon Beetle Larva]] {{x|1}} | ||
**[[Careening Dirigibug]] | **[[Careening Dirigibug]] {{x|3}} | ||
*'''Obstacles''': | *'''Obstacles''': | ||
**Gas pipe | **Gas pipe {{x|2}} | ||
*'''Others''': | *'''Others''': | ||
**None | **None | ||
Be wary when starting this floor as Wollywogs may appear close to the research pod. In the center of the area is a burrowing Armored Cannon Beetle Larva surrounded by a moat; it does not carry a treasure but it can be a nuisance when Pikmin are working. | |||
[[File: | |||
==Sublevel 3== | |||
[[File:P2R Miracle X s3.png|thumb|200px|Sublevel 3.]] | |||
*'''Theme''': Concrete | *'''Theme''': Concrete | ||
*'''Music''': ''Soil 3'' | *'''Music''': ''Soil 3'' | ||
| Line 177: | Line 189: | ||
**Glee Spinner (inside an Emperor Bulblax) | **Glee Spinner (inside an Emperor Bulblax) | ||
*'''Enemies''': | *'''Enemies''': | ||
**[[Dwarf Red Bulborb]] | **[[Dwarf Red Bulborb]] {{x|7}} | ||
**[[Emperor Bulblax]] | **[[Emperor Bulblax]] {{x|3}} | ||
**[[Withering Blowhog]] | **[[Withering Blowhog]] {{x|1}} | ||
*'''Obstacles''': | *'''Obstacles''': | ||
**Electrical wire | **Electrical wire {{x|6}} | ||
**Bomb-rock | **Bomb-rock {{x|5}} (drops from the sky) | ||
*'''Others''': | *'''Others''': | ||
**None | **None | ||
There are three Emperor Bulblaxes hiding in this rather large sublevel; one carries the Glee Spinner and they may also appear in the many pools of water. Usage of ultra-bitter sprays is recommended if there are Blowhogs nearby while fighting the Bulblaxes. | |||
[[File: | |||
==Sublevel 4== | |||
[[File:P2R Miracle X s4.png|thumb|200px|Sublevel 4.]] | |||
*'''Theme''': Concrete | *'''Theme''': Concrete | ||
*'''Music''': ''Electricity'' | *'''Music''': ''Electricity'' | ||
| Line 194: | Line 207: | ||
**Mirrored Element | **Mirrored Element | ||
*'''Enemies''': | *'''Enemies''': | ||
**[[Creeping Chrysanthemum]] | **[[Creeping Chrysanthemum]] {{x|8}} | ||
**[[Doodlebug]] | **[[Doodlebug]] {{x|5}} | ||
**[[Hermit Crawmad]] | **[[Hermit Crawmad]] {{x|1}} | ||
**[[Burrowing Snagret]] | **[[Burrowing Snagret]] {{x|1}} | ||
*'''Obstacles''': | *'''Obstacles''': | ||
**None | **None | ||
*'''Others''': | *'''Others''': | ||
**None | **None | ||
Another fairly large sublevel, this one features an abundance of flora that conceal the Creeping Chrysanthemums scattered about. Several Doodlebugs and a Burrowing Snagret also wait below the foliage covering, so clearing a path before bringing in the treasure is advised. | |||
[[File: | |||
==Sublevel 5== | |||
[[File:P2R Miracle X s5.png|thumb|200px|Sublevel 5.]] | |||
*'''Theme''': Snow | *'''Theme''': Snow | ||
*'''Music''': ''Snow 3'' | *'''Music''': ''Snow 3'' | ||
| Line 211: | Line 225: | ||
**Insect Condo (inside the Gatling Groink) | **Insect Condo (inside the Gatling Groink) | ||
*'''Enemies''': | *'''Enemies''': | ||
**[[Wollywog]] | **[[Wollywog]] {{x|2}} | ||
**[[Snow Bulborb]] | **[[Snow Bulborb]] {{x|9}} | ||
**[[Shearwig]] | **[[Shearwig]] {{x|7}} | ||
**[[Gatling Groink]] | **[[Gatling Groink]] {{x|1}} | ||
*'''Obstacles''': | *'''Obstacles''': | ||
**Boulder | **Boulder {{x|12}} | ||
*'''Others''': | *'''Others''': | ||
**1 type of gate, with 1800 HP | **1 type of gate, with 1800 HP | ||
Several gates of varying color block most of the tunnels in this sublevel, which may occasionally wall off the wandering Gatling Groink from the starting room. Beware of the falling boulders when exploring. | |||
[[File: | |||
==Sublevel 6== | |||
[[File:P2R Miracle X s6.png|thumb|200px|Sublevel 6.]] | |||
*'''Theme''': Snow | *'''Theme''': Snow | ||
*'''Music''': ''Bulblax'' | *'''Music''': ''Bulblax'' | ||
| Line 228: | Line 243: | ||
**Future Orb (inside a Fiery Bulblax) | **Future Orb (inside a Fiery Bulblax) | ||
*'''Enemies''': | *'''Enemies''': | ||
**[[Careening Dirigibug]] | **[[Careening Dirigibug]] {{x|4}} | ||
**[[Fiery Bulblax]] | **[[Fiery Bulblax]] {{x|4}} (all but one drop from the sky) | ||
*'''Obstacles''': | *'''Obstacles''': | ||
**Bomb-rock | **Bomb-rock {{x|3}} | ||
*'''Others''': | *'''Others''': | ||
**None | **None | ||
This floor has a simple layout that betrays its surprisingly dangerous setup. Three random alcoves contain hidden Fiery Bulblaxes which wake up at the moment they land, making locating a safe area to dismiss your Pikmin a game of chance. There is another Fiery Bulblax that contains the treasure; this one will never fall from the ceiling and is usually in plain sight. | |||
[[File: | |||
==Sublevel 7== | |||
[[File:P2R Miracle X s7.png|thumb|200px|Sublevel 7.]] | |||
*'''Theme''': Toybox | *'''Theme''': Toybox | ||
*'''Music''': ''None'' | *'''Music''': ''None'' | ||
| Line 243: | Line 259: | ||
**Essence of Desire (inside the Man-at-Legs) | **Essence of Desire (inside the Man-at-Legs) | ||
*'''Enemies''': | *'''Enemies''': | ||
**[[Fiery Dweevil]] | **[[Fiery Dweevil]] {{x|2}} | ||
**[[Anode Dweevil]] | **[[Anode Dweevil]] {{x|2}} | ||
**[[Munge Dweevil]] | **[[Munge Dweevil]] {{x|2}} | ||
**[[Caustic Dweevil]] | **[[Caustic Dweevil]] {{x|2}} | ||
**[[Volatile Dweevil]] | **[[Volatile Dweevil]] {{x|2}} | ||
**[[Swooping Snitchbug]] | **[[Swooping Snitchbug]] {{x|4}} | ||
**[[Man-at-Legs]] | **[[Man-at-Legs]] {{x|1}} | ||
*'''Obstacles''': | *'''Obstacles''': | ||
**None | **None | ||
*'''Others''': | *'''Others''': | ||
**None | **None | ||
A small arena with a wall of building blocks protecting the spawn point and many Dweevils of all colors. The Man-at-Legs is perched on a tower in the center of the map, a setup that prevents Purple Pikmin from ambushing as it emerges from the ground. As the other enemies can become problematic while fighting the boss, clearing them out before starting the battle is highly recommended. | |||
[[File: | |||
==Sublevel 8== | |||
[[File:P2R Miracle X s8.png|thumb|200px|Sublevel 8.]] | |||
*'''Theme''': Toybox | *'''Theme''': Toybox | ||
*'''Music''': ''Toybox 1'' | *'''Music''': ''Toybox 1'' | ||
| Line 264: | Line 281: | ||
**Possessed Squash | **Possessed Squash | ||
*'''Enemies''': | *'''Enemies''': | ||
**[[Beady Long Legs]] | **[[Beady Long Legs]] {{x|3}} | ||
**[[Red Bulborb]] | **[[Red Bulborb]] {{x|1}} | ||
**[[Orange Bulborb]] | **[[Orange Bulborb]] {{x|1}} | ||
**[[Shearwig]] | **[[Shearwig]] {{x|10}} | ||
*'''Obstacles''': | *'''Obstacles''': | ||
**Fire geyser | **Fire geyser {{x|11}} | ||
**Electrical wire | **Electrical wire {{x|5}} | ||
*'''Others''': | *'''Others''': | ||
**None | **None | ||
Similarly to floor 3, there are three minibosses lurking about, one of which holds a treasure. In this case, they are Beady Long Legs. Since this is one of the largest sublevels in Miracle X, most of the smaller enemies are fairly spread out. Avoid the large Bulborbs whenever possible unless they are too close to the Beady Long Legs carrying the treasure. | |||
[[File: | |||
==Sublevel 9== | |||
[[File:P2R Miracle X s9.png|thumb|200px|Sublevel 9.]] | |||
*'''Theme''': Soil | *'''Theme''': Soil | ||
*'''Music''': ''Hole of Heroes'' | *'''Music''': ''Hole of Heroes'' | ||
| Line 282: | Line 300: | ||
**Hypnotic Platter | **Hypnotic Platter | ||
*'''Enemies''': | *'''Enemies''': | ||
**[[Bumbling Snitchbug]] | **[[Bumbling Snitchbug]] {{x|4}} | ||
**[[Anode Beetle]] | **[[Anode Beetle]] {{x|9}} | ||
**[[Lesser Spotted Jellyfloat]] | **[[Lesser Spotted Jellyfloat]] {{x|2}} | ||
**[[Armored Cannon Beetle Larva]] | **[[Armored Cannon Beetle Larva]] {{x|3}} | ||
*'''Obstacles''': | *'''Obstacles''': | ||
**Electrical wire | **Electrical wire {{x|6}} | ||
**Bomb-rock | **Bomb-rock {{x|4}} (falls from the sky) | ||
*'''Others''': | *'''Others''': | ||
** Egg | ** Egg | ||
**[[Violet Candypop Bud]] (falls from the sky) | **[[Violet Candypop Bud]] {{x|1}} (falls from the sky) | ||
There are many pipe corridors running through this swampy sublevel, many of which are guarded by electrical wires and Armored Cannon Beetle Larvae. Careful analysis of the layout is key to getting through with no Pikmin losses, and Blue Pikmin should be used to defeat any beasts wading through the water. | |||
==Sublevel 10== | |||
[[File: | [[File:P2R Miracle X s10.png|thumb|200px|Sublevel 10.]] | ||
*'''Theme''': Soil | *'''Theme''': Soil | ||
*'''Music''': ''Fire'' | *'''Music''': ''Fire'' | ||
| Line 301: | Line 320: | ||
**Talisman of Life (inside a Spotty Bulbear) | **Talisman of Life (inside a Spotty Bulbear) | ||
*'''Enemies''': | *'''Enemies''': | ||
**[[Dwarf Bulbear]] | **[[Dwarf Bulbear]] {{x|18}} | ||
**[[Spotty Bulbear]] | **[[Spotty Bulbear]] {{x|5}} (falls from the sky) | ||
*'''Obstacles''': | *'''Obstacles''': | ||
**Fire geyser | **Fire geyser {{x|7}} | ||
*'''Others''': | *'''Others''': | ||
**None | **None | ||
A very cramped, maze-like sublevel full of fire, though the most dangerous obstacles are the Spotty Bulbears that fall from the ceiling. Only one is necessary to fight, but it is very easy to accidentally trip one while searching around for the exit. Pay attention to the Dwarf Bulbears; they will be able to detect their larger, hungrier friends and inadvertently signal out their locations. | |||
[[File: | |||
==Sublevel 11== | |||
[[File:P2R Miracle X s11.png|thumb|200px|Sublevel 11.]] | |||
*'''Theme''': Tile | *'''Theme''': Tile | ||
*'''Music''': ''Tile 1'' | *'''Music''': ''Tile 1'' | ||
| Line 317: | Line 337: | ||
**Yellow Taste Tyrant (inside the Segmented Crawbster) | **Yellow Taste Tyrant (inside the Segmented Crawbster) | ||
*'''Enemies''': | *'''Enemies''': | ||
**[[Dwarf Orange Bulborb]] | **[[Dwarf Orange Bulborb]] {{x|12}} | ||
**[[Withering Blowhog]] | **[[Withering Blowhog]] {{x|2}} | ||
**[[Ranging Bloyster]] | **[[Ranging Bloyster]] {{x|1}} | ||
**[[Segmented Crawbster]] | **[[Segmented Crawbster]] {{x|1}} | ||
*'''Obstacles''': | *'''Obstacles''': | ||
**Gas pipe | **Gas pipe {{x|6}} | ||
**Boulder | **Boulder {{x|18}} | ||
*'''Others''': | *'''Others''': | ||
**None | **None | ||
This is the hardest sublevel in the cave. There are two bosses; a Ranging Bloyster and a Segmented Crawbster, as well as several gas pipes, boulders and Withering Blowhogs. Both bosses carry a treasure, and will not always appear in separate rooms. The ideal layout has the bosses in separate pools of water; the most open areas in the sublevel despite being restricted to Blue Pikmin. | |||
[[File: | |||
==Sublevel 12== | |||
[[File:P2R Miracle X s12.png|thumb|200px|Sublevel 12.]] | |||
*'''Theme''': Tile | *'''Theme''': Tile | ||
*'''Music''': ''Rest'' | *'''Music''': ''Rest'' | ||
| Line 335: | Line 356: | ||
**None | **None | ||
*'''Enemies''': | *'''Enemies''': | ||
**[[Mamuta]] | **[[Mamuta]] {{x|1}} | ||
**[[Honeywisp]] | **[[Honeywisp]] {{x|4}} | ||
*'''Obstacles''': | *'''Obstacles''': | ||
**None | **None | ||
*'''Others''': | *'''Others''': | ||
**[[Queen Candypop Bud]] | **[[Queen Candypop Bud]] {{x|2}} | ||
**Egg | **[[Nectar egg|Egg]] {{x|4}} | ||
A small rest floor before the penultimate challenge. A pair of Queen Candypop Buds and some Honeywisps allow one to recuperate in case the previous floor decimated their Pikmin squad. The Mamuta should not be too much of a hassle given that the player should have the Pluckaphone by this point. | |||
==Sublevel 13== | |||
[[File: | [[File:P2R Miracle X s13.png|thumb|200px|Sublevel 13.]] | ||
*'''Theme''': Metal | *'''Theme''': Metal | ||
*'''Music''': ''Bulblax'' | *'''Music''': ''Bulblax'' | ||
| Line 352: | Line 374: | ||
**Universal Com (inside the Fiery Bulblax) | **Universal Com (inside the Fiery Bulblax) | ||
*'''Enemies''': | *'''Enemies''': | ||
**[[Fiery Bulblax]] | **[[Fiery Bulblax]] {{x|1}} | ||
**[[Puffy Blowhog]] | **[[Puffy Blowhog]] {{x|2}} | ||
**[[Swooping Snitchbug]] | **[[Swooping Snitchbug]] {{x|3}} | ||
**[[Watery Blowhog]] | **[[Watery Blowhog]] {{x|5}} | ||
**[[Decorated Cannon Beetle]] | **[[Decorated Cannon Beetle]] {{x|3}} | ||
**[[Antenna Beetle]] | **[[Antenna Beetle]] {{x|2}} | ||
*'''Obstacles''': | *'''Obstacles''': | ||
**Bomb-rock | **Bomb-rock {{x|9}} | ||
**Electrical wire | **Electrical wire {{x|8}} | ||
**Gas pipe | **Gas pipe {{x|6}} | ||
*'''Others''': | *'''Others''': | ||
**Egg | **Egg {{x|1}} (falls from the sky) | ||
**1 type of gate, with 2500 HP | **1 type of gate, with 2500 HP | ||
A very large and hazy sublevel that is distinct from the others by nature of having nearly every elemental and environmental hazard in the game. Fire, water, electricity, poison, wind, boulders and bombs, plus some nuisance enemies such as Antenna Beetles and a lot of gates; a fitting arrangement for the final non-boss sublevel in the game. | |||
[[File: | |||
==Sublevel 14== | |||
[[File:P2R Miracle X s14.png|thumb|200px|Sublevel 14.]] | |||
*'''Theme''': Metal | *'''Theme''': Metal | ||
*'''Music''': ''Titan Dweevil'' | *'''Music''': ''Titan Dweevil'' | ||
| Line 378: | Line 401: | ||
**King of Bugs | **King of Bugs | ||
*'''Enemies''': | *'''Enemies''': | ||
**[[Titan Dweevil]] | **[[Titan Dweevil]] {{x|1}} | ||
**[[Bumbling Snitchbug]] | **[[Bumbling Snitchbug]] {{x|9}} | ||
*'''Obstacles''': | *'''Obstacles''': | ||
**None | **None | ||
*'''Others''': | *'''Others''': | ||
**None | **None | ||
The Titan Dweevil sits in the center of a spiderweb-patterned arena surrounded by Bumbling Snitchbugs. | |||
Latest revision as of 16:52, 19 February 2024
|
Reason: Split into cave articles named Ancient Gardens and Miracle X. Get DrTapeworm's permission first. |
Ancient Gardens
Sublevel 1
- Theme: Metal
- Music: Toybox 2
- Enemies:
 Breadbug × 1
 Red Bulborb × 6
- Vegetation:
- None
- Obstacles:
 Fire geyser × 9
- Others:
- None
Sublevel 2
- Theme: Metal
- Music: Metal 3
- Enemies:
- Vegetation:
- None
- Obstacles:
 Boulder × 9
 Electrical wire × 9
- Others:
- None
Sublevel 3
- Theme: Metal
- Music: Snow 1
- Enemies:
 Dwarf Bulbear × 51 (18 fall from the sky)
 Spotty Bulbear × 2
 Yellow Wollywog × 2
- Vegetation:
- None
- Obstacles:
 Bramble gate with 4,000 hit points × 1
- Others:
- None
Sublevel 4
- Theme: Metal
- Music: None
- Enemies:
 Burrowing Snagret × 2
 Orange Bulborb × 1
 Pileated Snagret × 1
- Vegetation:
- None
- Obstacles:
 Gas pipe × 4
- Others:
 Egg × 3
Sublevel 5
- Theme: Metal
- Music: Rest
- Enemies:
- None
- Vegetation:
- Obstacles:
- None
- Others:
 Egg × 3 (falls from the sky)
Sublevel 6
- Theme: Concrete
- Music: Snagret
- Enemies:
 Creeping Chrysanthemum × 8
 Emperor Bulblax × 1
 Gatling Groink × 3
- Vegetation:
- None
- Obstacles:
- None
- Others:
- None
Sublevel 7
- Theme: Metal, yard
- Music: Electricity
- Enemies:
 Careening Dirigibug × 2 (falls from the sky)
 Dwarf Bulbear × 6
 Dwarf Orange Bulborb × 9
 Gatling Groink × 2
 Hermit Crawmad × 4
- Vegetation:
- None
- Obstacles:
 Fire geyser × 6
 Gas pipe × 5
- Others:
 Bramble gate with 4,000 hit points × 1
Sublevel 8
- Theme: Metal, yard
- Music: Metal 2
- Enemies:
 Fiery Blowhog × 3
 Man-at-Legs × 1
 Orange Bulborb × 2
 Puffy Blowhog × 2
 Toady Bloyster × 1
 Water Dumple × 4
- Vegetation:
- None
- Obstacles:
 Fire geyser × 8
- Others:
 Egg × 4
Sublevel 9
- Theme: Metal
- Music: Soil 2
- Enemies:
 Burrowing Snagret × 4
 Careening Dirigibug × 17 (11 fall from the sky)
 Dwarf Bulbear × 9
 Spotty Bulbear × 2
- Vegetation:
- None
- Obstacles:
 Electrical wire × 4
 Bomb rock × 9
- Others:
- None
Sublevel 10
- Theme: Toybox
- Music: None
- Enemies:
- Vegetation:
- None
- Obstacles:
- None
- Others:
- None
Miracle X
|
Notes: Add the remaining icons, and clean all sections beyond that of sublevel 1. |
Sublevel 1
- Theme: Metal
- Music: Metal 2
- Treasures:
- Enemies:
 Hairy Bulborb × 3
 Volatile Dweevil × 9 (falls from the sky)
- Obstacles:
 Bomb rock × 9
 Fire geyser × 5
- Others:
- None
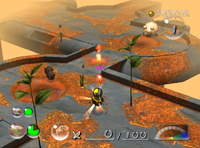
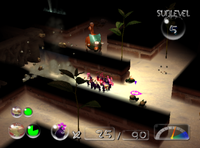
The first sublevel of Miracle X is simple but also one of the more dangerous ones, as the majority of enemies are Volatile Dweevils that ambush leaders and Pikmin from above. Scouting out the area with a captain is highly recommended.
Sublevel 2
- Theme: Metal
- Music: Metal 3
- Treasures:
- Implement of Toil
- Enemies:
- Obstacles:
- Gas pipe × 2
- Others:
- None
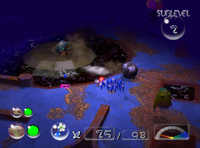
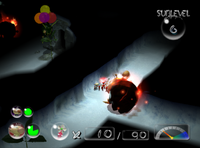
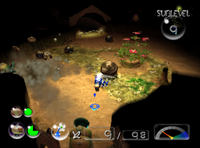
Be wary when starting this floor as Wollywogs may appear close to the research pod. In the center of the area is a burrowing Armored Cannon Beetle Larva surrounded by a moat; it does not carry a treasure but it can be a nuisance when Pikmin are working.
Sublevel 3
- Theme: Concrete
- Music: Soil 3
- Treasures:
- Glee Spinner (inside an Emperor Bulblax)
- Enemies:
- Dwarf Red Bulborb × 7
- Emperor Bulblax × 3
- Withering Blowhog × 1
- Obstacles:
- Electrical wire × 6
- Bomb-rock × 5 (drops from the sky)
- Others:
- None
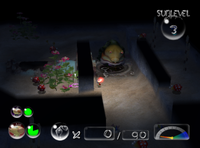
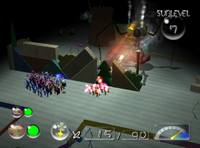
There are three Emperor Bulblaxes hiding in this rather large sublevel; one carries the Glee Spinner and they may also appear in the many pools of water. Usage of ultra-bitter sprays is recommended if there are Blowhogs nearby while fighting the Bulblaxes.
Sublevel 4
- Theme: Concrete
- Music: Electricity
- Treasures:
- Mirrored Element
- Enemies:
- Creeping Chrysanthemum × 8
- Doodlebug × 5
- Hermit Crawmad × 1
- Burrowing Snagret × 1
- Obstacles:
- None
- Others:
- None
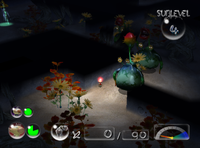
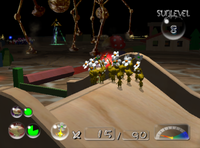
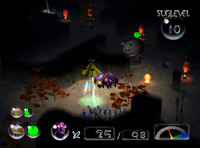
Another fairly large sublevel, this one features an abundance of flora that conceal the Creeping Chrysanthemums scattered about. Several Doodlebugs and a Burrowing Snagret also wait below the foliage covering, so clearing a path before bringing in the treasure is advised.
Sublevel 5
- Theme: Snow
- Music: Snow 3
- Treasures:
- Insect Condo (inside the Gatling Groink)
- Enemies:
- Wollywog × 2
- Snow Bulborb × 9
- Shearwig × 7
- Gatling Groink × 1
- Obstacles:
- Boulder × 12
- Others:
- 1 type of gate, with 1800 HP
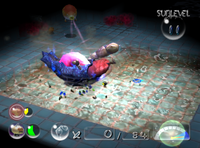
Several gates of varying color block most of the tunnels in this sublevel, which may occasionally wall off the wandering Gatling Groink from the starting room. Beware of the falling boulders when exploring.
Sublevel 6
- Theme: Snow
- Music: Bulblax
- Treasures:
- Future Orb (inside a Fiery Bulblax)
- Enemies:
- Careening Dirigibug × 4
- Fiery Bulblax × 4 (all but one drop from the sky)
- Obstacles:
- Bomb-rock × 3
- Others:
- None
This floor has a simple layout that betrays its surprisingly dangerous setup. Three random alcoves contain hidden Fiery Bulblaxes which wake up at the moment they land, making locating a safe area to dismiss your Pikmin a game of chance. There is another Fiery Bulblax that contains the treasure; this one will never fall from the ceiling and is usually in plain sight.
Sublevel 7
- Theme: Toybox
- Music: None
- Treasures:
- Essence of Desire (inside the Man-at-Legs)
- Enemies:
- Fiery Dweevil × 2
- Anode Dweevil × 2
- Munge Dweevil × 2
- Caustic Dweevil × 2
- Volatile Dweevil × 2
- Swooping Snitchbug × 4
- Man-at-Legs × 1
- Obstacles:
- None
- Others:
- None
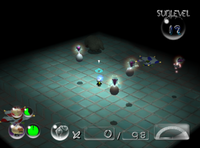
A small arena with a wall of building blocks protecting the spawn point and many Dweevils of all colors. The Man-at-Legs is perched on a tower in the center of the map, a setup that prevents Purple Pikmin from ambushing as it emerges from the ground. As the other enemies can become problematic while fighting the boss, clearing them out before starting the battle is highly recommended.
Sublevel 8
- Theme: Toybox
- Music: Toybox 1
- Treasures:
- Extreme Perspirator (inside a Beady Long Legs)
- Possessed Squash
- Enemies:
- Beady Long Legs × 3
- Red Bulborb × 1
- Orange Bulborb × 1
- Shearwig × 10
- Obstacles:
- Fire geyser × 11
- Electrical wire × 5
- Others:
- None
Similarly to floor 3, there are three minibosses lurking about, one of which holds a treasure. In this case, they are Beady Long Legs. Since this is one of the largest sublevels in Miracle X, most of the smaller enemies are fairly spread out. Avoid the large Bulborbs whenever possible unless they are too close to the Beady Long Legs carrying the treasure.
Sublevel 9
- Theme: Soil
- Music: Hole of Heroes
- Treasures:
- Hypnotic Platter
- Enemies:
- Obstacles:
- Electrical wire × 6
- Bomb-rock × 4 (falls from the sky)
- Others:
- Egg
- Violet Candypop Bud × 1 (falls from the sky)
There are many pipe corridors running through this swampy sublevel, many of which are guarded by electrical wires and Armored Cannon Beetle Larvae. Careful analysis of the layout is key to getting through with no Pikmin losses, and Blue Pikmin should be used to defeat any beasts wading through the water.
Sublevel 10
- Theme: Soil
- Music: Fire
- Treasures:
- Talisman of Life (inside a Spotty Bulbear)
- Enemies:
- Dwarf Bulbear × 18
- Spotty Bulbear × 5 (falls from the sky)
- Obstacles:
- Fire geyser × 7
- Others:
- None
A very cramped, maze-like sublevel full of fire, though the most dangerous obstacles are the Spotty Bulbears that fall from the ceiling. Only one is necessary to fight, but it is very easy to accidentally trip one while searching around for the exit. Pay attention to the Dwarf Bulbears; they will be able to detect their larger, hungrier friends and inadvertently signal out their locations.
Sublevel 11
- Theme: Tile
- Music: Tile 1
- Treasures:
- Boss Stone (inside the Ranging Bloyster)
- Yellow Taste Tyrant (inside the Segmented Crawbster)
- Enemies:
- Dwarf Orange Bulborb × 12
- Withering Blowhog × 2
- Ranging Bloyster × 1
- Segmented Crawbster × 1
- Obstacles:
- Gas pipe × 6
- Boulder × 18
- Others:
- None
This is the hardest sublevel in the cave. There are two bosses; a Ranging Bloyster and a Segmented Crawbster, as well as several gas pipes, boulders and Withering Blowhogs. Both bosses carry a treasure, and will not always appear in separate rooms. The ideal layout has the bosses in separate pools of water; the most open areas in the sublevel despite being restricted to Blue Pikmin.
Sublevel 12
- Theme: Tile
- Music: Rest
- Treasures:
- None
- Enemies:
- Obstacles:
- None
- Others:
- Queen Candypop Bud × 2
- Egg × 4
A small rest floor before the penultimate challenge. A pair of Queen Candypop Buds and some Honeywisps allow one to recuperate in case the previous floor decimated their Pikmin squad. The Mamuta should not be too much of a hassle given that the player should have the Pluckaphone by this point.
Sublevel 13
- Theme: Metal
- Music: Bulblax
- Treasures:
- Stringent Container
- Universal Com (inside the Fiery Bulblax)
- Enemies:
- Fiery Bulblax × 1
- Puffy Blowhog × 2
- Swooping Snitchbug × 3
- Watery Blowhog × 5
- Decorated Cannon Beetle × 3
- Antenna Beetle × 2
- Obstacles:
- Bomb-rock × 9
- Electrical wire × 8
- Gas pipe × 6
- Others:
- Egg × 1 (falls from the sky)
- 1 type of gate, with 2500 HP
A very large and hazy sublevel that is distinct from the others by nature of having nearly every elemental and environmental hazard in the game. Fire, water, electricity, poison, wind, boulders and bombs, plus some nuisance enemies such as Antenna Beetles and a lot of gates; a fitting arrangement for the final non-boss sublevel in the game.
Sublevel 14
- Theme: Metal
- Music: Titan Dweevil
- Treasures:
- Comedy Bomb
- Flare Cannon
- Monster Pump
- Shock Therapist
- King of Bugs
- Enemies:
- Titan Dweevil × 1
- Bumbling Snitchbug × 9
- Obstacles:
- None
- Others:
- None
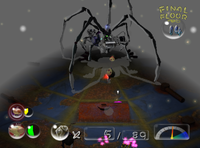
The Titan Dweevil sits in the center of a spiderweb-patterned arena surrounded by Bumbling Snitchbugs.

